Working with digital ads.
What are digital ads?
With the advent of web technologies day-by-day, advertisements on the web are now created in HTML5 as the preferred format instead of Flash, which used to be the norm a decade ago. This shift to HTML5 allows brands and content creators to create ads that run seamlessly and look great on all digital platforms and devices—from desktop to mobile and more.
Using web fonts in HTML5 ads allows you to build content and user-experiences that are on-brand, responsive, dynamic and personalized with messaging based on geolocation and other factors.
Digital ads in your library.
Very much like web projects, digital ads in Monotype Fonts are another grouping option for organizing your font library and preparing your web fonts for use in HTML5 ads. They provide the same subsetting and font-hosting capabilities as web projects with the exception of monitoring usage of your fonts based on Impressions your HTML5 digital ads make when you deploy them on various ad networks. More on monitoring and reporting usage here.
Please note: digital ad lists created before August 2021 are using sunsetted web font services and functionality will be restricted. Read our article for help with legacy digital ad lists.
In this article, we will cover the following topics:
Creating a digital ad.
-
To create a digital ad, begin by clicking on the Create new button in the sidebar.

-
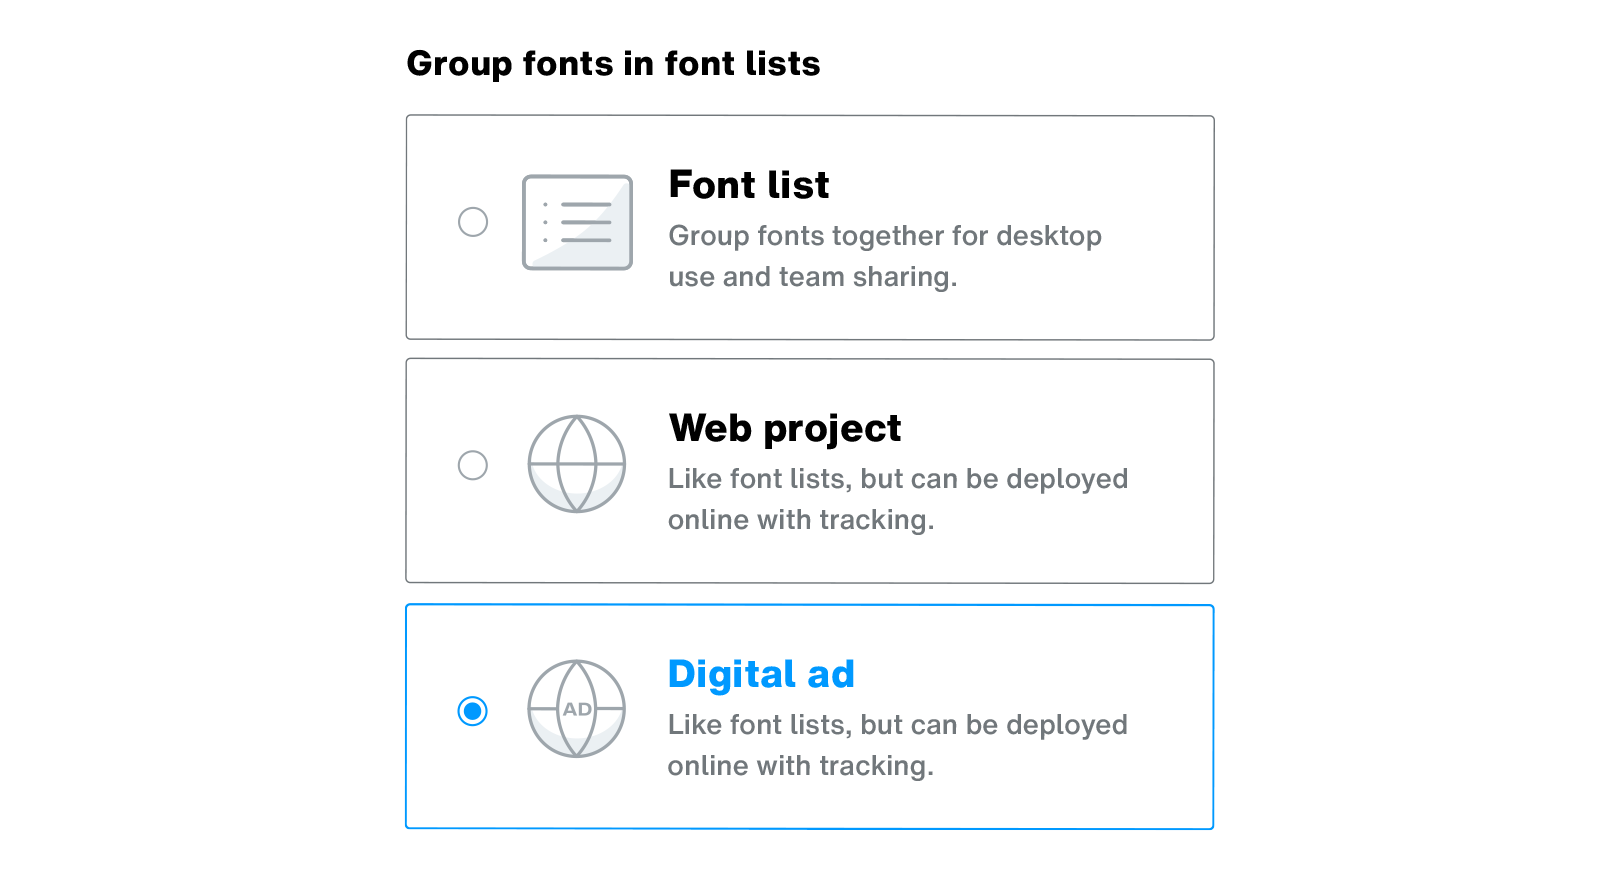
Next, select Digital ad from the “Create new” dialog.
-
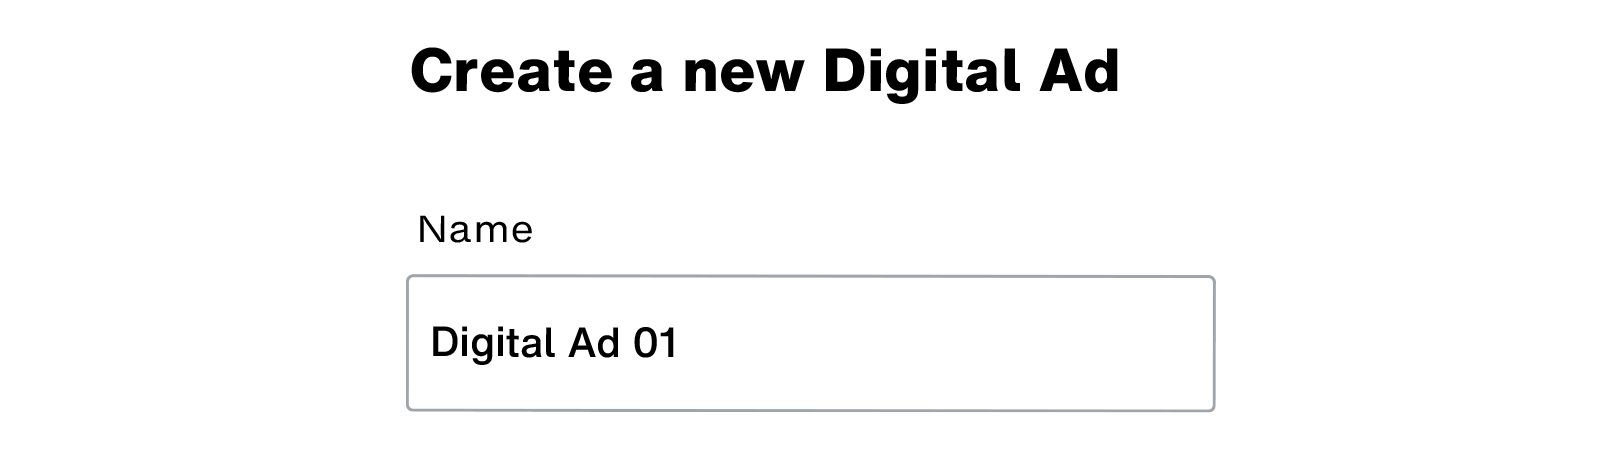
Next, enter a Name for your digital ad.
-
Finally, click on the Create button.

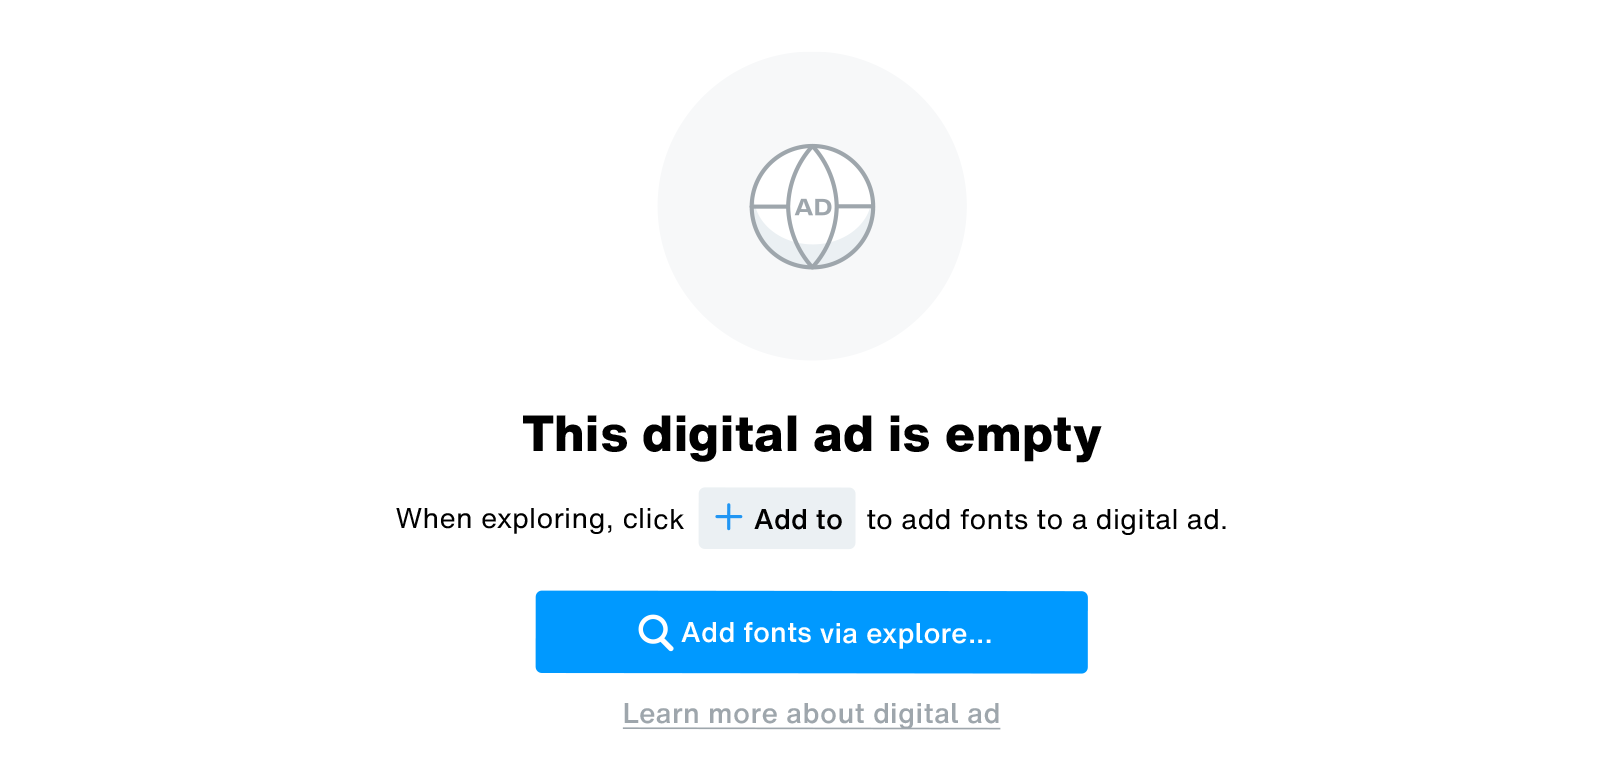
Your new digital ad will appear in the sidebar. Click on it to open it in the main view and start adding fonts to your new web project.
Adding (and removing) fonts in a digital ad.
You can add fonts in your digital ads from anywhere you encounter the Add to button on a screen throughout your font discovery & management journey, just as we did with font lists—from the Browse section, search results, font and family pages, and more.
As an example, let’s add the Helvetica Now family to a digital ad.
-
Begin by clicking on the Add to button on Helvetica Now’s family page.

-
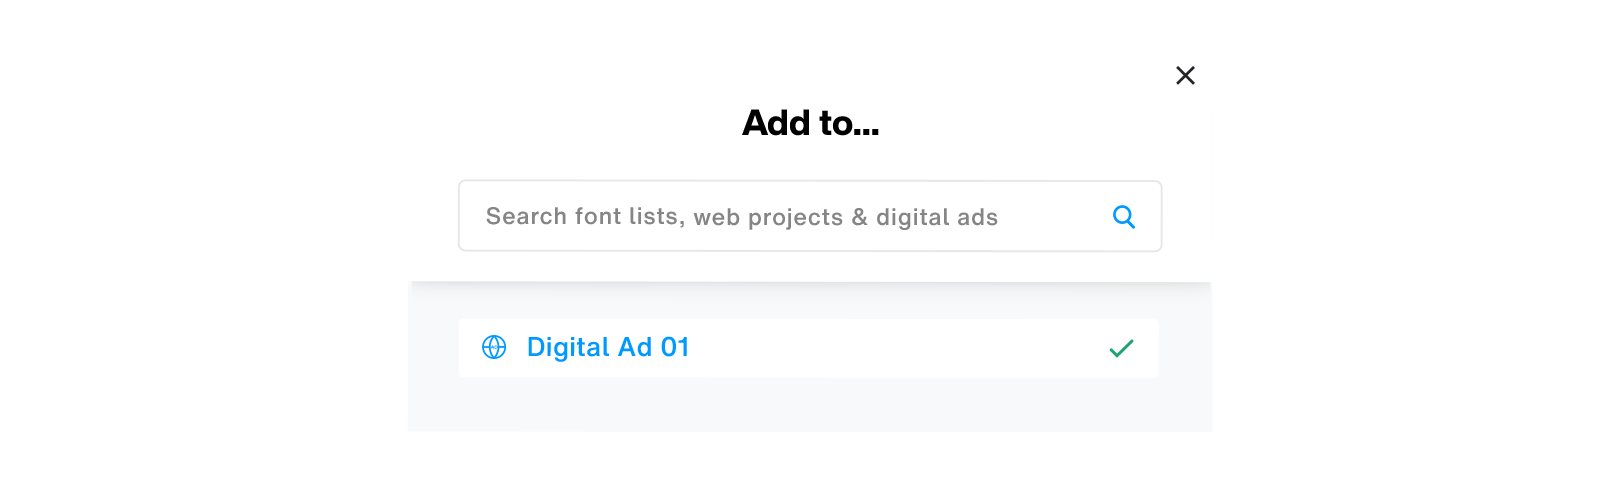
This will bring up the “Add to” dialog. Select the digital ad(s) you’d like to add your fonts to. In this case, we’ll use the sample digital ad named “Digital Ad 01” created using the steps outlined in the previous section.
-
Click on the Done button to add the family to your digital ad.

-
Click on the My Library tab in the header to go to your library.

-
Click on your digital ad in the sidebar to open it in the main view on the right.
-
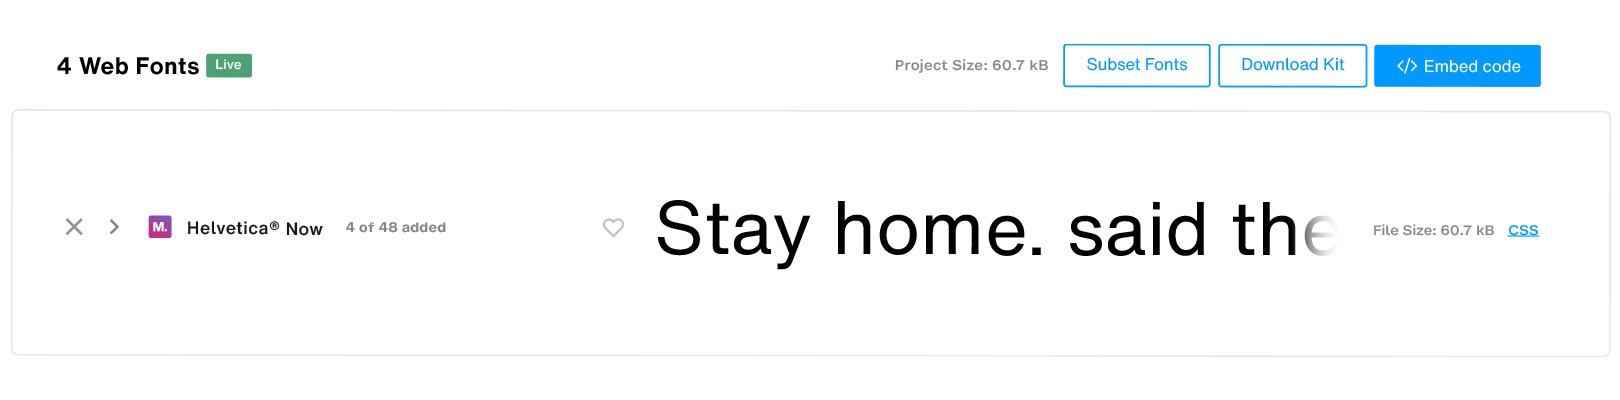
The font family you added—in this case, Helvetica Now—appears as the following:
-
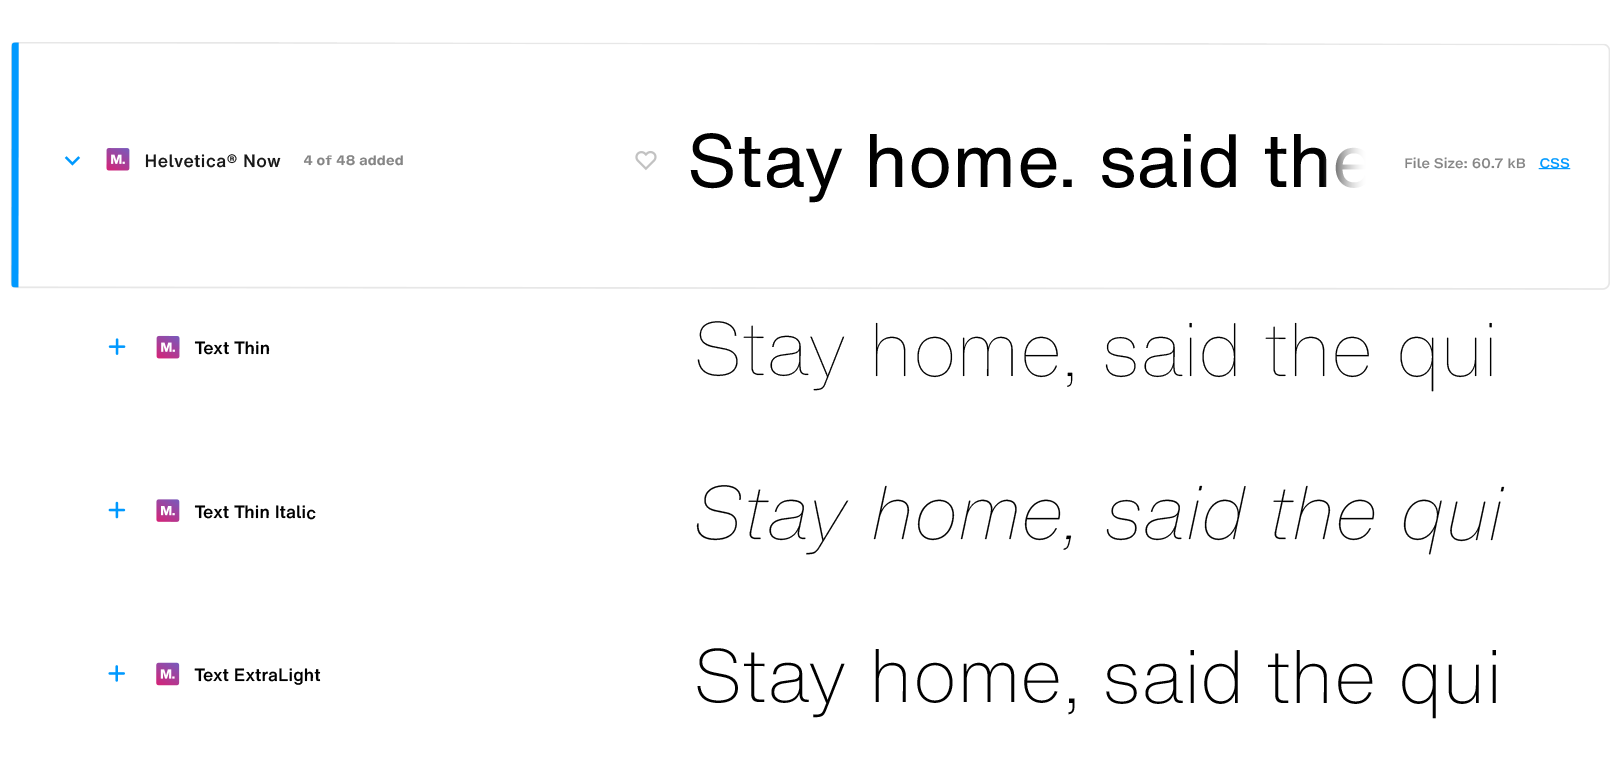
To keep the web font package size to an optimal, only a select few styles of a font family—in this case, Helvetica Now—are automatically added to your digital ad. You can click on the Expand icon to view all weights and styles and add the ones you need by clicking on the + icon beside each style in the list.
-
To remove a style, or the entire family, hover over a font row and click on the cross-shaped Remove icon.

Sharing, revoking and defining access levels for a digital ad.
Sharing digital ads with members of your team is just as simple as sharing font lists.
Sharing and granting access to a digital ad.
-
To share a digital ad, open a digital ad by clicking on it in the left sidebar.

-
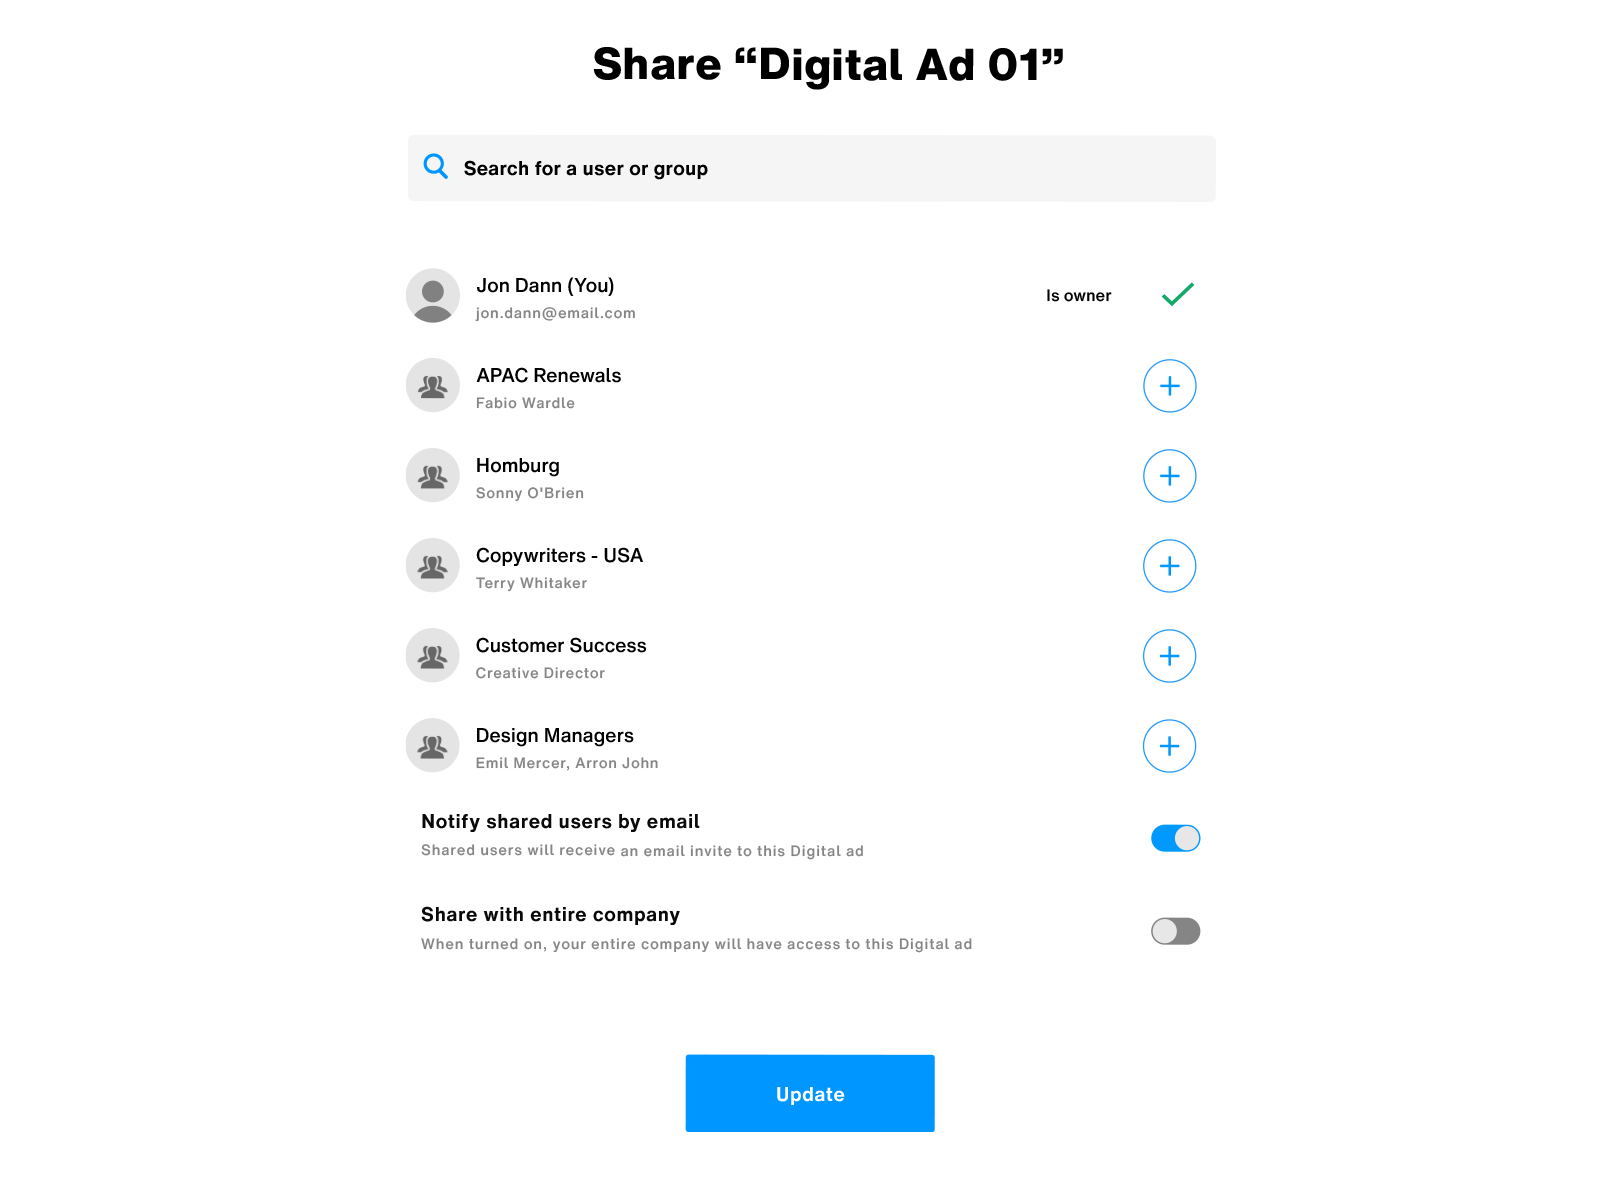
Once the digital ad is open in the main view, click on the Share access button to bring up the sharing dialog.

-
In the sharing dialog, select teams and individuals to share the digital ad with by clicking on the + button next to their names. You can also search for specific teams or individuals by using the search bar in this dialog.
-
Once you’ve added users to a digital ad, you can also define their access level by clicking on the access-level drop-down menu that appears against their name. This is set to View only by default, but can be changed to any of the following levels:

-
Is owner.
Users with “Is owner” access can:
-
Add fonts to the shared digital ad.
-
Share the digital ad with other users providing either “Can edit” or “View only” access.
-
Remove fonts from the shared digital ad.
-
Edit the shared digital ad—edit the Name and Description for the shared digital ad.
-
Duplicate the shared digital ad.
-
Delete the shared digital ad.
-
Subset web fonts.
-
Generate embed code(s) for web fonts.
-
Download web fonts self-hosting kit.
-
-
Can edit.
Users with “Can edit” access can:
-
Add fonts to the shared digital ad.
-
Share the digital ad with other users providing either “Can edit” or “View only” access.
-
Remove fonts from the shared digital ad.
-
Duplicate the shared digital ad.
-
Subset web fonts.
-
Generate embed code(s) for web fonts.
-
Download web fonts self-hosting kit.
-
-
View only.
Users with “View only” access level can, as the name suggests, only view the web project shared with them. These users may, however, depending upon the specific permissions set for their role, generate web fonts embed codes and download web font self-hosting kit.
-
-
You can also choose to notify users you’ve shared your digital ad with via email using the Notify shared users by email option toggle-switch.

-
You may also choose to share a digital ad with your entire company in one go by clicking on the Share with entire company toggle-switch.

-
Once you’re ready, click on the Update button for changes to take effect.

Revoking access to a digital ad.
-
To revoke a user’s access to a shared digital ad, open the sharing dialog and search for the user or team, and hover over the checkmark icon next to their name.

-
This will toggle the checkmark icon to a cross-shaped Remove access button. Click on it to revoke access.

Download & contact.


Contact us.
Thank you for contacting us.
One of our support team members will contact you via email shortly.
Related content

My Library: Overview.
My Library is where your fonts and your creative projects come together to create an organized, visual map of all the things you’re working on, whom you’re working with and where your fonts are making an impact.

Working with font lists & folders.
Font lists are one of the many font grouping tools you have at your avail when it comes to organizing your Library. Add fonts to font lists to share them with the people working with you on your creative projects—teams and individuals alike.